Propane Heater Lighting Instructions for Gasland Heater
Unboxing and Initial Setup
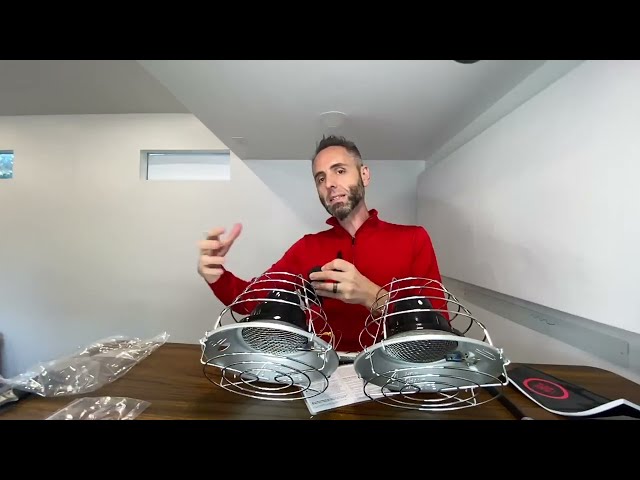
Opening up the Gasland Propane Heater box was like a mini treasure hunt. Inside, I found two heater units, a hose, laminated instructions, and all the screws I needed. It's always a thrill to see everything neatly packed and ready for action. If you've ever felt that rush of setting up a new gadget, you know exactly what I mean. Now, let's get to work.
First off, mounting the heater was a breeze. With the screws provided, I attached the mount securely. It's like putting together a piece of furniture where everything just clicks. Once you have the heater mounted, you'll feel that sense of accomplishment, like you're one step closer to beating the winter chill.
As I explored the components, I found connectors, valve knobs, and some wiring. These bits might look a little intimidating at first, but each part plays a role in keeping the heater running smoothly. It's kind of like a puzzle where every piece has its place. Knowing what's what helps when you need to troubleshoot later on.
Preparing to Light Your Propane Heater
Before you even think about lighting the heater, safety is the name of the game. I can't stress enough how important it is to read the user manual. The lighting instructions are your best friend here. Trust me, spending a few minutes going through it can save you a lot of headaches down the line.
One of my first steps was inspecting the heater. I checked all the connections and wiring to make sure everything was secure and damage-free. This is like checking your car's oil before a road trip—essential for smooth operation. It's always better to catch issues early.
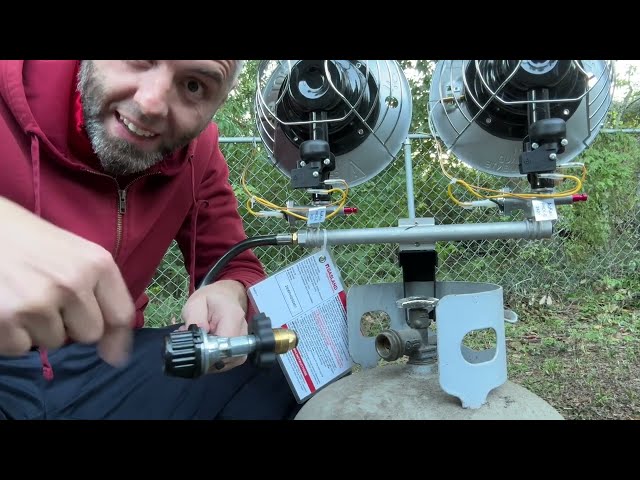
Next up, securing the propane tank connection. I attached the heater to the propane tank using the internal threads. Remember, it's counterclockwise for this part. It's a simple twist that sets the stage for the heat to flow smoothly. Once you've got it tight, you're ready for the next step.
Step-by-Step Lighting Instructions
With everything in place, it's time to open the propane tank valve. A quick glance to ensure all connections are secure brings peace of mind. Once that's done, you're clear to open the valve, letting the gas flow. This is where the magic begins.
Adjusting the heater settings is next on the list. I turned the knob to my desired setting—Off, Low, Medium, or High. It's like tuning a radio to your favorite station. Each click brings you closer to the warmth you're craving.
Now for the lighting process. I inserted a lighter through the designated lighting hole and pressed the gas release valve while keeping the flame steady. Holding the valve for 30 seconds might seem like forever, but it's crucial for securing the flame. Slowly releasing it afterward feels like a small victory every time.
Operating and Adjusting Your Heater
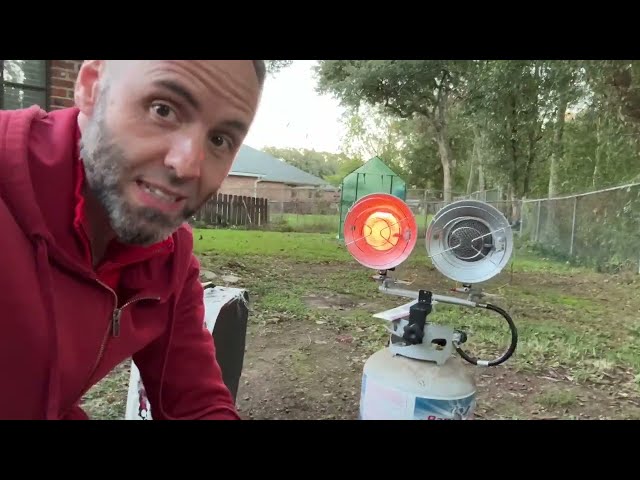
Once the heater is roaring, adjusting the heat output is a breeze. The knob allows me to tweak the temperature to my liking. Whether it's a chilly morning or a frosty evening, finding that sweet spot is pure satisfaction.
Using dual heater units is an option I love. Depending on how cold it is, I can light one or both units. It's like having a customizable comfort zone right at my fingertips. Whether I'm in my garage or outside, I can cater to my exact needs.
Shutting Down the Heater
Turning off the heater is as easy as pie. I simply moved the control valve back to the "Off" position. It's like flipping a switch, and suddenly the warmth fades, leaving behind a cozy memory.
Safety doesn't stop when the heater's off. I made sure to close the propane tank valve securely. It's the final step in ensuring everything is safe and sound until next use. Think of it as locking up your house before heading out.
When it comes to proper storage, disconnecting and safely storing your heater is key. I found a dry spot to keep everything tucked away when not in use. It’s like putting away winter clothes at the end of the season, knowing they'll be ready when the cold returns.
Pros & Cons
Pros
- Dual heating units allow for customizable heat output; you can use one or both depending on your needs.
- Easy installation process takes only a few minutes and requires minimal tools.
- Laminated instruction manual provides clear guidance on setup and safety, ensuring long-term usability.
- Parabolic design effectively directs heat where needed, making it ideal for outdoor use in cold weather.
Cons
- The heater requires a propane tank, which is not included, potentially adding to initial costs for users.
- Lighting the heater can be slightly unintuitive; users must remember to turn the valve counter-clockwise to connect.
- Heat output may not be sufficient for very large open spaces, limiting its effectiveness in larger areas.
Ratings
- Ease of Setup: 5
- Instruction Clarity: 5
- Customizability of Heat Output: 5
- Design Effectiveness: 4
- Initial Cost Consideration: 3
- Lighting Process Intuitiveness: 3
- Heat Output for Large Spaces: 3
Thanks for reading — DAD OUT!


Comments