Step-by-Step Guide to Full LifePro 1-Person Sauna Assembly
 Who knew that building a sauna could be your own at-home version of putting together the Death Star—but much, much easier? With the LifePro 1-Person Sauna, you’re just a few steps away from personal tranquility. Let's face it, sometimes you need a break from the galactic chaos of life, and this sauna aims to be the hero in your wellness story. So buckle up as we navigate through the cosmos of sauna assembly, one piece at a time! Whether you're a DIY Jedi or just someone trying to relax a little more, this guide is here to help you out!
Preparing for Your Sauna Assembly Adventure
Before you start your sauna assembly adventure, it's crucial to gather the necessary tools and materials. An Allen wrench and basic screwdrivers are your best friends here, and trust me, having them handy can save you from a lot of headaches. A quick check of all sauna parts upon arrival is a must—just to make sure everything's in place and nothing's missing. If you're feeling extra, you might want to grab some spray foam for additional insulation, but that's totally optional.
Picking the perfect spot for your sauna is half the battle. You'll want to consider space requirements, ensuring there's enough room for the sauna and for you to move around comfortably. Think about weight distribution and ventilation too; these saunas aren't super heavy, but good airflow is key for the best experience. A little planning goes a long way in creating your wellness retreat at home.
Assembling the Base and Bench
Fitting the base is your first step, and aligning and securing it with screws is pretty straightforward. Adjusting the balance for stability is crucial, so take your time to get it just right. You'll pat yourself on the back later when everything feels solid and secure.
Installing the bench is next, and it's all about correct placement and securing it properly. Ensuring a snug fit is important to support the weight when you're using the sauna. I've found that a little patience here makes all the difference in creating a sturdy, comfortable seating area.
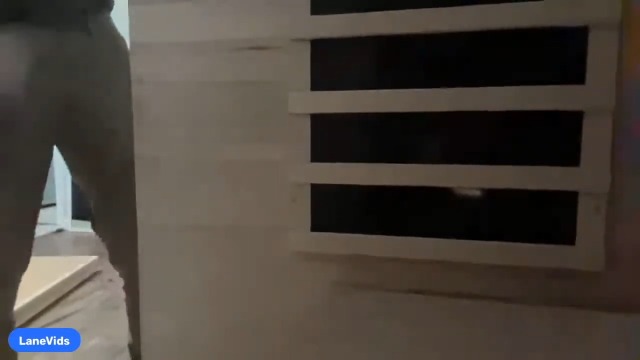
Securing the Sauna Walls
Attaching the side panels involves identifying the correct alignment with grooves, which can be a bit of a puzzle at first. Once you get the hang of it, fitting the panels with minimal hassle becomes easier. It's one of those tasks that feels rewarding once everything clicks into place.
Setting up the back panel requires a bit of support until the side panels are secure. Handling the attached cords with care is essential to prevent any damage. It might feel like a juggling act, but once it's done, you're one step closer to your relaxation sanctuary.
Applying the Finishing Touches
Installing the door and front grate involves aligning the door smoothly and making sure it's functional. Convenience features like handles and seals come in handy for easy access and a good fit. It’s the little things that enhance the overall experience.
For the final ceiling placement, lining up the top correctly ensures everything fits snugly. Managing the wiring for electrical connections is crucial, and taking a bit of extra time here pays off in the long run. Once the ceiling is in place, you're almost ready to enjoy the benefits of infrared saunas.
Testing and Customizing Your Sauna
Once everything's assembled, it's time for the initial setup and test run. Checking the functionality of heaters and lights is essential to make sure everything works as it should. Verifying structural integrity gives you peace of mind, knowing your sauna is safe and sound.
Personal customization options are where you can really make the sauna your own. Adding insulation for better heat retention is one way to enhance your experience. Setting up music and light preferences adds a personal touch, turning your sauna into a true relaxation haven. It's these customizations that make your sauna more than just a piece of wellness tech; it's your personal retreat.


![]() Buy Now on Amazon: https://geni.us/ELBdgf (affiliate)
Buy Now on Amazon: https://geni.us/ELBdgf (affiliate)
- Includes clear, colored instructions with pictures for easy assembly.
- Lightweight panels make it easy to maneuver and assemble.
- Pre-drilled screw holes simplify the setup process.
- Latch system for easy panel connection.
- Bench and heater panels are easy to install with clear markings.
- Efficient design with cable management through designated holes.
- Requires two hours to assemble, which might be time-consuming for some users.
- Some parts of the assembly could be challenging to align without assistance.

Product Ratings:
- Preparing for Your Sauna Assembly Adventure: 4/5
- Assembling the Base and Bench: 4.5/5
- Securing the Sauna Walls: 4/5
- Applying the Finishing Touches: 4.5/5
- Testing and Customizing Your Sauna: 4.5/5
Overall Score: 4.3/5
Thank yall for reading / watching and DAD OUT!

![]() Buy Now on Amazon: https://geni.us/ELBdgf (affiliate)
Buy Now on Amazon: https://geni.us/ELBdgf (affiliate)
https://dadreviews.org/step-by-step-guide-to-full-lifepro-1-person-sauna-assembly/?feed_id=35154&_unique_id=695967ad6d085


Comments